Hello and welcome to day 3 our Canadian blog hop tour!
We had soo much fun doing our last blog hop we couldn't resist planning another one and this time we have even more bloggers joining us YAY. I can't wait to see over the next 10 days what everyone else has been working on and we have three fabulous prize packs up for grabs at the end of our tour so don't forget to enter via the Rafflecopter widget at the bottom of this post!
As we're celebrating all things Canadian I had the perfect excuse to use one of the many Blue Calla Patterns I have and after finding the most delicious grommets I just couldn't resist making the Dahlia drawstring bucket bag. Celine has recently had a fantastic sewalong on the Dahlia bag on her blog and has kindly agreed to extend her sewalong offer of 40% off the pattern for the duration of our tour by using the code "dahliasal".
The pattern comes in pdf format and is 28 pages long in which Celine thoroughly guides us through how to make the Dahlia Bag step by step with a combination of easy to follow written instructions and full colour photos.
After I printed out and assembled the pattern pieces I should mention that I had planned to use some of my Alison Glass Ex-Libris Bookplate fabric to make this bag but I completely changed my mind after finding my cork colours weren't as good a match as I wanted... so back to the drawing board.
Some of you may know that in addition to making and selling handbags I also sell Tula Pink, Amy Butler & other Free Spirit fabrics online here in my TangledBlossomsdesign.com store. It's great to have lots and lots of gorgeous fabrics to choose from but the drawback is that it can take me ages to decide what fabrics to use! After pulling lots and lots of bolts off my shelves and laying the pattern pieces out on them I realized the size of the front, back and side panels would be absolutely perfect for showing off one of my favourite Tula Pink Moonshine fabrics - Deer Me in strawberry which also happened to match two of my cork colours and went fabulously with Tula's Tudor Windows in Tart for the lining.

I printed two copies of all pattern pieces that were to be placed to cut fabrics on a fold as I planned to fussy cut my Deer Me fabric and I find it easier to fussy cut with a full size pattern piece rather than just half the pattern piece on a fold. I also printed extra copies of the side pattern pieces so I could make a separate side panel pocket pattern piece as I had decided to use cork fabric for the side pockets and needed to modify that pattern piece a bit.
There are quite a few parts to cut out but it's very straight forward when you separate everything into their specific piles.
After cutting everything out I set to work fusing my SF101 woven interfacing, Thermolam and Peltex 71F to their specific parts and with that all out of the way it's onto the fun.... sewing! First you start off with the strap assembly. The pattern stipulates making one rectangle ring but the matchy matchy OCD in me had to make two so both sides of my shoulder strap would be attached to the bag in the same way. I also decided to add a rivet to each too add some extra reinforcement. My rectangle rings and rivets btw came from the wonderful emmaline bags in Alberta and my interfacing etc from Flare fabrics based in BC, Canada.
After the strap assembly you move onto the side panels and pockets. As I mentioned earlier I decided to use cork for my pockets and as cork is quite springy and thick I decided to add a 3/8ths inch seam allowance to the top of the pocket pattern piece so I could use cork for the outside and my lining fabric for the inside of my pocket. After basting the finished pocket pieces to the side panels you add the side pocket overlays. I chose to do mine in my creamy white cork so they would stand out against the Deer Me and Bordeaux red cork
Here I have to confess that I got totally absorbed with sewing Dahlia now and completely forgot to take photos of my adding the front panel overlay and the rivets I added to my side pocket overlays... but after you've done those and sewn the sides to the front & back panels it's straight onto adding your bottom. I wasn't taking any chances of the layers moving about so after matching my centers I used lots of clips to hold everything in place.
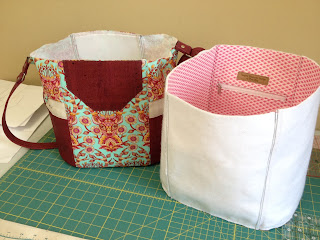
and then all of a sudden it's all coming together! Squeeee she's looking soo pretty <3
 The lining goes together in the same way but has 2 pockets (1 zippered and 1 slip pocket) instead of overlays.
Then it's onto the final assembly... Sewing the exterior and lining together leaving an opening in the top and turning it right sides out
The lining goes together in the same way but has 2 pockets (1 zippered and 1 slip pocket) instead of overlays.
Then it's onto the final assembly... Sewing the exterior and lining together leaving an opening in the top and turning it right sides out
 Top stitch all around the top opening edge and......
Mark the positions to add your grommets - these gorgeous shiny nickel snap grommets come from Karen Pickard of BringBerry Hardware based in New Brunswick. For info on all of her hardware you can join her Facebook group here. Just to make sure I had mine in the right place I put two of mine on the pins to take a look.
Top stitch all around the top opening edge and......
Mark the positions to add your grommets - these gorgeous shiny nickel snap grommets come from Karen Pickard of BringBerry Hardware based in New Brunswick. For info on all of her hardware you can join her Facebook group here. Just to make sure I had mine in the right place I put two of mine on the pins to take a look.
The final step is to make the drawstring and cincher. I decided to use my creamy white cork again and because the cork fabric is a bit bulkier than quilting cotton I made my cincher a little bigger and secured it with two more Emmaline rivets. For thet extra blingy touch after threading the drawstring through all the grommets and cincher I finished my Dahlia by adding a shiny nickel end to each of the drawstring ends.
I loved sewing this bag! She's bigger than I expected and a great size for a mummy bag with littles. Plenty of room for drinks bottles and all those other bits and bobs we carry around.
I have one more thing to make before I list her in my Tangled Blossoms etsy shop - a matching drawstring bag to put her in which I make for every bag I make.
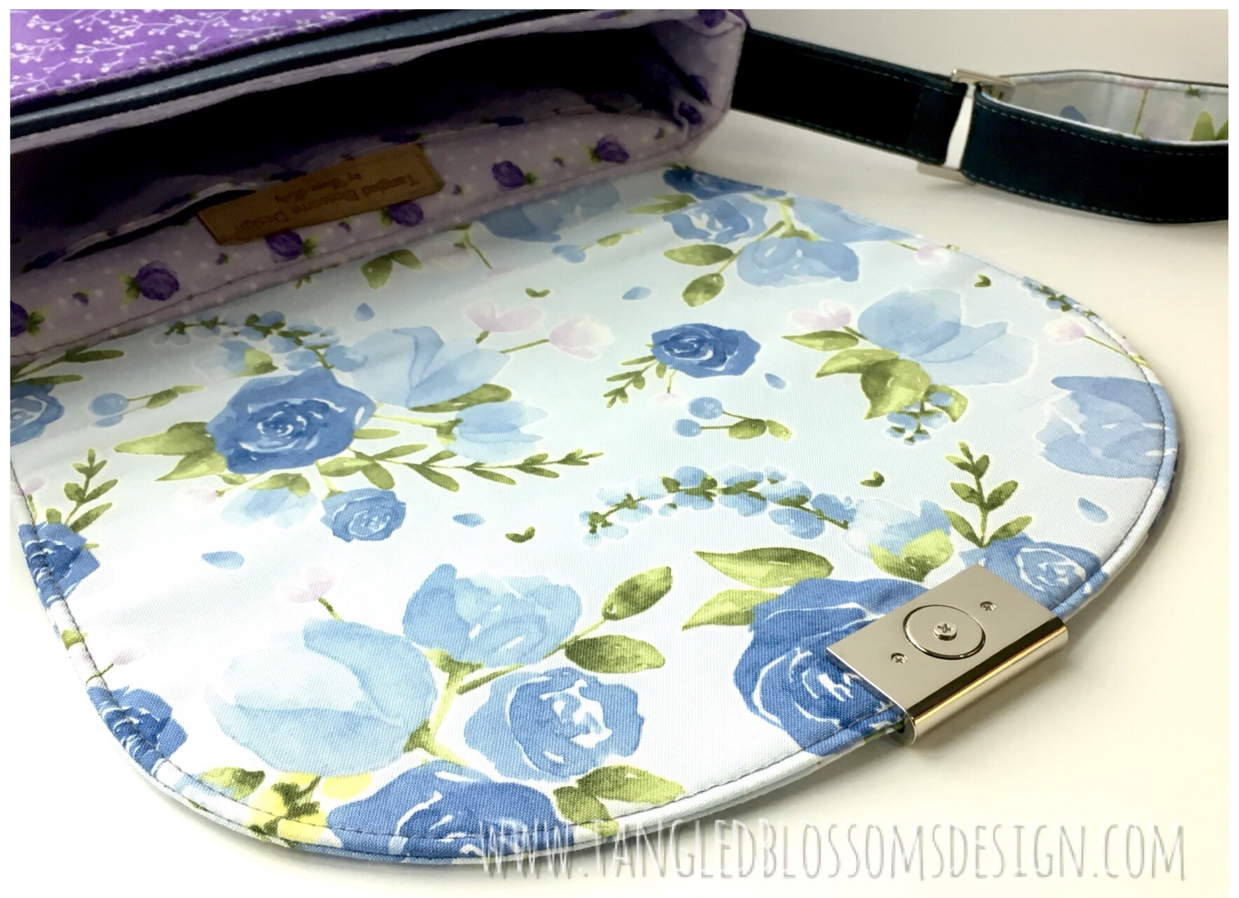
Here's some more photos of my finished Dahlia inside and out and don't forget to enter our rafflecopter giveaway below!

Canada Day 2016 Blog Hop Schedule
Be sure to visit each of these fantastic blogs this week for more on our outstanding Canadian designers and suppliers and don't forget to enter our giveaway for some yummylicious prizes.
* Yes, we know!


